Blog
How to: create a tablet webview for your Pepper robot application
Here is a tutorial on the basics of creating an HTML5 webview to display on the tablet for your Pepper application.
All the code is on Github.
Setting up your projects
Create your app, open your app properties choose a Project Name, then save your project. Now reopen properties, and choose the uuid you like for your project. You can also check other settings, especially the robot requirements (Pepper Y20) and Software version (2.4 and up).
Now create a folder called html. It has to be that name, and in lowercase. When you upload your app to your robot, NaoqiOS will check for this folder and serve it with its NGinx server.
Download and put needed libraries in project folder (see troubleshooting). For example I often include jquery in my projects in the js folder.
Also, add your javascript file as js/script.js, and stylesheet as css/style.css.
In your html, use relative paths for files that are part of your application project:
1
2
3
<script src="/libs/qimessaging/2/qimessaging.js"></script>
<script src="js/jquery-3.1.0.min.js"></script>
<script type="text/javascript" src="js/script.js"></script>
On the other hand, note how I included the javascript SDK as an absolute path. This file is served by the robot and doesn’t need to be in your project.
Display the web page on the tablet
There are 2 ways to display the project page on the tablet. But before that, don’t forget to add something on your page. This will do:
1
<h1>Hello World!</h1>
Then from Python, for example in a Choregraphe box, do:
1
2
3
4
5
6
7
8
9
10
11
# method 1: use loadApplication
uid = self.packageUid()
self.session().service('ALTabletService').loadApplication(uid)

# method2: use loadUrl
#ip = self.session().service('ALTabletService').getRobotIp()
#url = 'http://' + ip + '/apps/' + uid + '/index.html'
#self.session().service('ALTabletService').loadUrl(url)

# at this point, the page is still hidden by default tablet screen
self.session().service('ALTabletService').showWebview()
Note that self.getPackageUid() is a method accessible only from Choregraphe boxes.
Method 1 will simply load the index.html file from your html folder. Method 2 allows you to choose exactly which file to display. This can be useful if the file to show by default depends on application context (language, time, user preference, etc…).
Start your application with Choregraphe and see “Hello World!” appear on your tablet.
Control your robot from the tablet
In this part, we will add a button to the tablet, and use it to make the robot talkself.
1
2
3
4
5
6
7
8
9
10
11
12
13
14
15
16
17
18
19
20
21
22
23
24
25
26
27
28
var session;

// connecting to robot
try {
  QiSession( function (s) {
    console.log('connected!');
    session = s;
    // now that we are connected, we can use the buttons on the page
    $('button').prop('disabled', false);
  });
} catch (err) {
  console.log("Error when initializing QiSession: " + err.message);
  console.log("Make sure you load this page from the robots server.")
}

// event callback
$(function () {
  $('#say').click(sayHelloWorld);
});

// example of calling a Naoqi API method
function sayHelloWorld() {
  session.service('ALTextToSpeech').then(function (tts) {
    tts.say('Hello World!');
  }, function (error) {
    console.log(error);
  })
}
Control the tablet from your robot
To change elements on the tablet from the robot application, the best way is to use events or signals. The javascript SDK only handles signals. Events were the base of an older API but are still very present in most official APIs.
Both are used in similar ways: when something happens, or a value is changed, callbacks are notified.
To react to an event in javascript, you need to first obtain a signal version of this event, and then connect a callback to the signal. Leaving the button callback from the previous section, the signal subscription looks like this:
1
2
3
4
5
6
7
8
9
10
11
12
13
14
15
16
17
18
19
20
21
22
23
24
25
// keeping a pointer to the session is very useful!
var session;
try {
QiSession( function (s) {
console.log('connected!');
session = s;
// now that we are connected, we can use the buttons on the page
$('button').prop('disabled', false);
s.service('ALMemory').then(function (memory) {
memory.subscriber('TouchChanged').then(function (subscriber) {
subscriber.signal.connect(changeTitle);
});
});
});
} catch (err) {
console.log("Error when initializing QiSession: " + err.message);
console.log("Make sure you load this page from the robots server.")
}
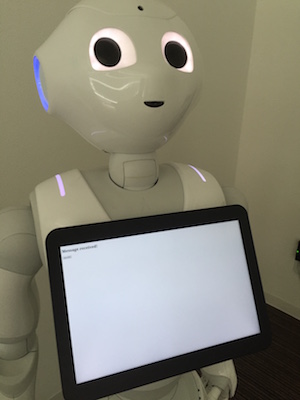
function changeTitle(data) {
$('h1').text('Message received!')
}
// say Hello ...
The whole javascript is available here.
From there, you can create a tablet application that connects to your application and interact with the user and the robot easily.
By now, your tablet should be looking like simple but be functional.
Troubleshooting
Can’t load jQuery or elements from the web? When you connect your robot to the wifi, the tablet connects as well. But I found out that often, the tablet is not actually connected to the wifi and so my apps couldn’t load jQuery for example. Overall, I install every javascript library into my app folder, and uses the main robot CPU to connect to the internet.
The tablet will retrieve info from the web by going through the robot’s connection. It is more stable that way.
Another point: you can use your PC tools to debug your tablet app! From a PC on the same wifi network, connect to http://<YOUR-ROBOT-IP>/apps/<app-uui>/index.html to load your web page. You will be prompted for a username and password. The username is nao and the password is the one you chose when you first booted up your Pepper.
Don’t forget to check the code on Github.
Blog Posts
How to: create a tablet webview for your Pepper robot application
August 8, 2016 . development .
Kokorobot is open!
August 1, 2016 . announcements .